10.16:
Conquest Strategy Guide
Category: Technical
Posted by: cataboligne
Greetings Programs.
This is the *** Conquest *** strategy guide v1.4
The guide has game information and a basic strategy lesson for neophyte players.
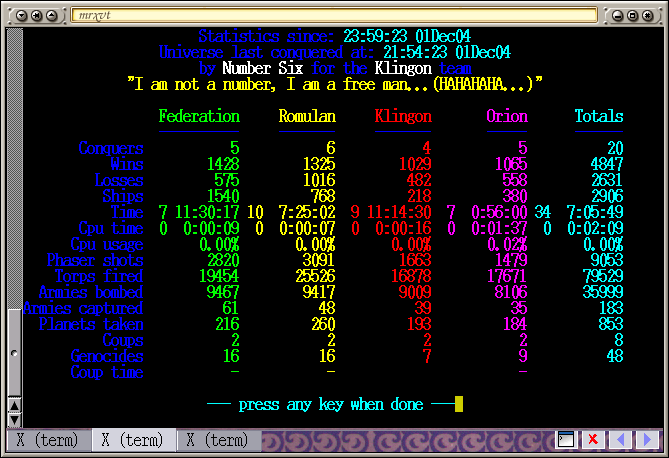
Read more for full details...

Guide sections
o- Introduction
o- Strategy Guide
- 1 - Download and Install
- 2 - Server Connection
- 3 - Initialize User
- 4 - Entering the Game
- 5 - Conquest Objectives
- 6 - Combat tactics
- 7 - Art of Conquest
- 8 - Advanced strategy
- 9 - Suggested etiquette
Introduction
Conquest = A fun multi player game featuring RTS elements and 3rd person shooter elements.
Conquest began life on VAX/VMS hardwired VT terminals in 1982 and was ported via artistic license to modern PC's and the internet in 1997. Recent updates by yours truly have lead to a snazzy version of the GL client interface.
Why play Conquest, you might ask?
The original Conquest incarnation on the VAX was fun and addicting. Very addicting as it turns out (as some college students grades and significant others inevitably suffered.)
That might seem odd for a text terminal game with no sound or fancy graphics. It was the multi player nature (rare for games of that era) of the game - a real time struggle against other unpredictable human players. This very element has led to the online success of Quake and its many descendants long after the single player experience was over.
Conquest has a rare blend of strategy, shooter action and combination of simple game play elements that leads to long lasting play-ability.
If you are a Conquest veteran like me, you may want to recapture that past glory...and you can play it exactly as you once did on a monochrome X-term by connecting to one of the available servers. You might find that players using the latest GL-client intensified glory have a slight advantage...You will want to even the odds, and have an entirely new game experience by using the GL-client.
On the other hand if you have never played conquest there are many reasons to give it a try. Don't let its humble text terminal origins fool you - conquest still is a fun and very addicting game! One of the great things about trying conquest is that the game play elements are simple to understand - you can be playing in a matter of minutes after installing the software. Then spend hours of enjoyment learning all the intricacies the easy game play provides.
On screen help covers all the commands available via keypress 'h' and the new mouse interface is a breeze to use. This is great for all the keyboard deficient out there who stay away from keyboard controlled games.
There are no confusing manuals to wade through...
You don't need to understand complex strategies or patterns to have fun...
The game starts quick - no need to wait on complex maps or renders.
Still, there are some who might find Conquest a bit daunting. The strategy guide that follows has been designed to guide you to a mastery of the game elements and give you a fair chance against those VAX veterans that are looking for a challenge!
Strategy Guide
1 - Download and Install
The first step for any neophyte is to download and install the game.
The necessary files and instructions are here: http://www.radscan.com/conquest.html
2 - Server Connection
Once installed, you can connect to any server on the master list via these commands in a text terminal:
conquest -m # terminal client version
conquestgl -m # GL-client version
You can also run the GL-client from any kind of menu or desktop shortcut you want just by using "conquestgl -m" as the command.
NOTE: you don't have to run a server (conquestd) or conqoper to connect to other servers.
For brevity, all further references and screens shown will be for the GL-client version. The terminal version has all the same keyboard commands and no sounds or mouse interface.
3 - Initialize User
Once you run "conquestgl -m" and connect you see this screen:
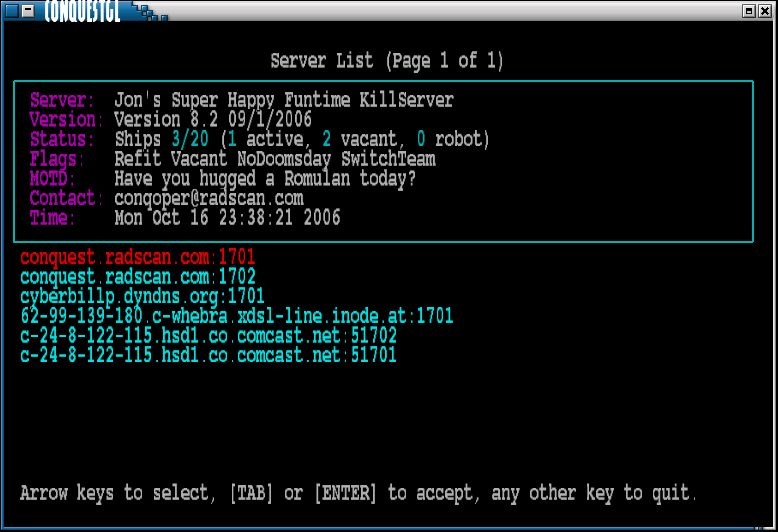
Pick a server of your choice using up and down then hit ENTER.
You will then see a login screen:
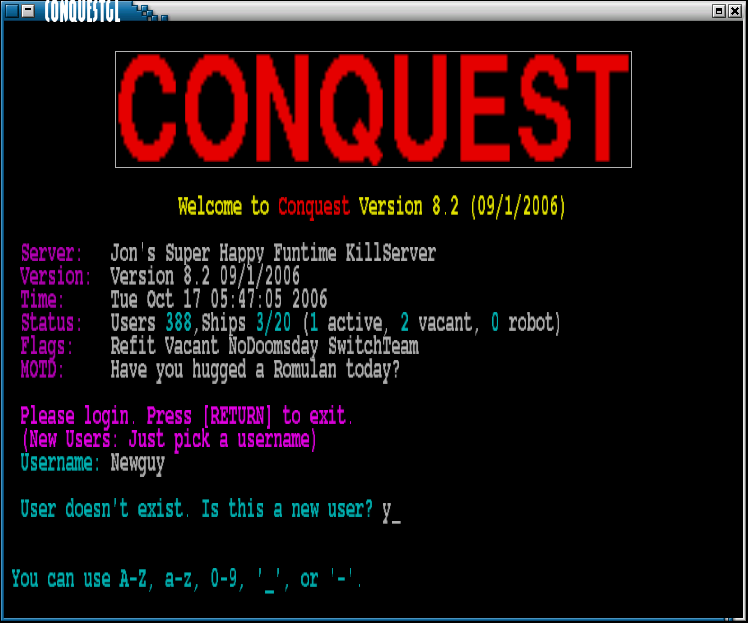
You are required on first connection to a server to enter a unique user name for access to that server. When it asks you if this is a new user enter 'Y'.
You will then be asked for a password. We strongly recommend not using any passwords used for other services such as internet, email and financial systems - just for security, the operator cannot read your password. The password is entered a second time for verification.
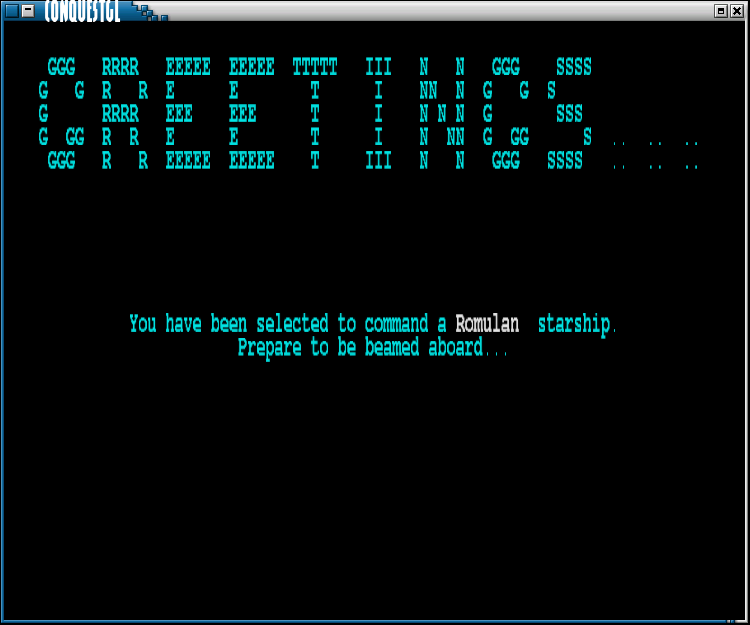
The server will select a random Conquest team - Federation, Klingon, Romulan or Orion - and place you in command of a ship in that space fleet:
4 - Entering the Game
A successful user login will always provide this screen (the greetings screen above only appears once):
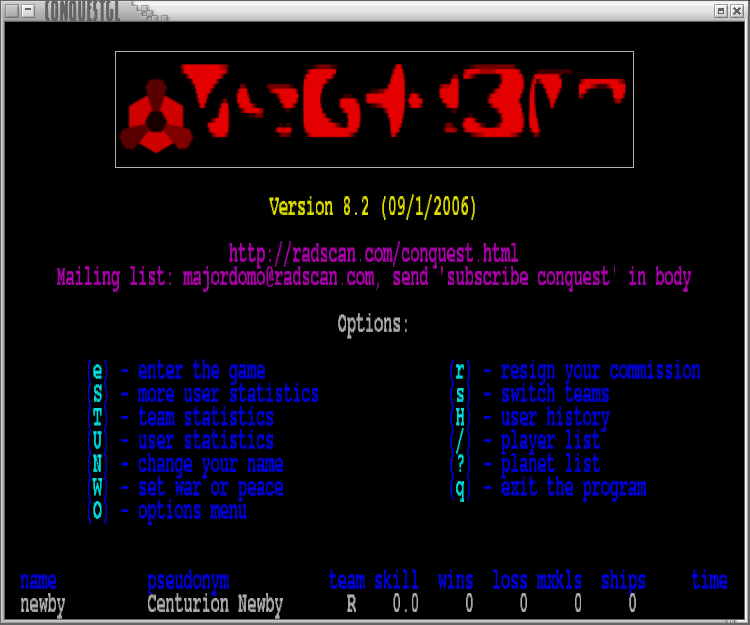
The title CONQUEST appears in the font of your team preceded by a team symbol. Additionally the server version and website information appear below the title. The bottom of the screen has a synopsis of your user stats from the (U) list.
The following options can be accessed -
options that affect or change your user account:
(e) - enter the game - with a new ship unless you left a *vacant ship from a previous login
(N) - provide a new pseudonym for your user account
(W) - *change war settings prior to game entry
(O) - *set player options
(r) - resign your commission - your account will be erased
(s) - switch team (if enabled by conqoper) - cycle through all conquest teams
options that don't change your user details:
(U) - User statistics list
(S) - Secondary user statistics list
(T) - Team statistics page
(H) - History of user logins
(/) - List active players / vacant ships / robots in the game
(?) - List planets in the game
(q) - logout from the server
* these items will be covered in more detail.
Press (O) to view the options screen:
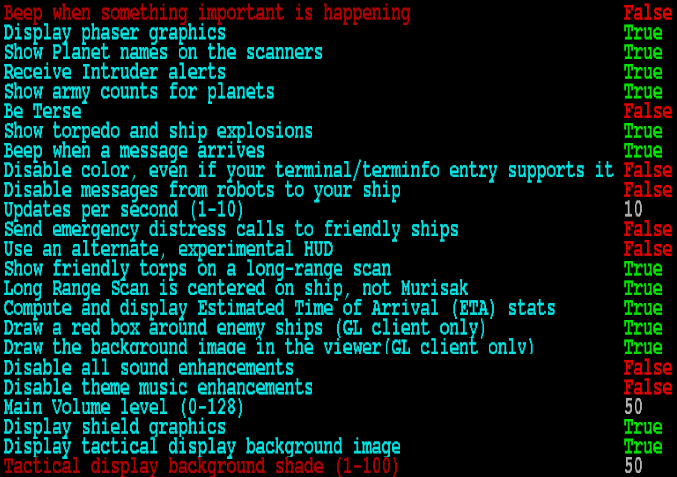
Note: the screen shown includes potential sound cfg options, and represents more than 1 screen.
Change an option using up and down to select then hit space.
There is more than one screen of options. True / False options will toggle. Numeric options require number entry.
Synopsis of each option:
Beep when something important is happening - when true a PC speaker beep for: alerts, orbits, attacks, damage, etc.
Display phaser graphics - when true show phaser beams in main viewer
Show planet names on scanners - when true planet names will show up in displays
Receive intrude alerts - when true alerts will be given for bombing attacks on team planets
Show army counts for planets - when true and army count will be displayed with planet name
Be terse - when true mundane messages (entering orbit) will not be sent
Show torpedo and ship explosions - when true ship and torp explosions will be displayed
Beep when a message arrives - when true a PC speaker beep for every message
Disable color - when true color will not be used for terminal output
Disable robot messages - when true robot messages will not be sent to your comms
Updates per second - number of packets / updates to display per second
Send emergency distress calls to friendly ships - when true distress will be sent to all non 'at war' ships
Use an alternate HUD - when true displays some extra info on a message line below the viewer
Show friendly torps on LRS - when true non 'at war' torps will display in LRS view
Long Range Scan is centered on ship, not Murisak - when true ship is centered in LRS view
Compute and display Estimated Time of Arrival (ETA) stats - when true ETA will be provided with (i)nfo
Draw a red box around enemy ships (GL client only) - when true a red square will appear around 'at war' ships
Draw the background image in the viewer(GL client only) - when true the background stars image will be displayed
Disable all sound - when true no sound will emanate from the 8.2+sound GL client
Disable theme music - when true effects sounds will play but music will not
Main Volume level - numeric value for volume to play sounds and music
Display shield levels in tactical display - when true a color coded shield visual aid will appear in viewer
Display tactical display background image - when true a tactical grid will appear behind the LRS view
Tactical display background shade (1-100) - numeric that provides the alpha shade for the tactical grid if active
Once options are set to your liking you will want to enter the live game on your selected server.
To enter a server's press (e) and you will get a screen similar to this:
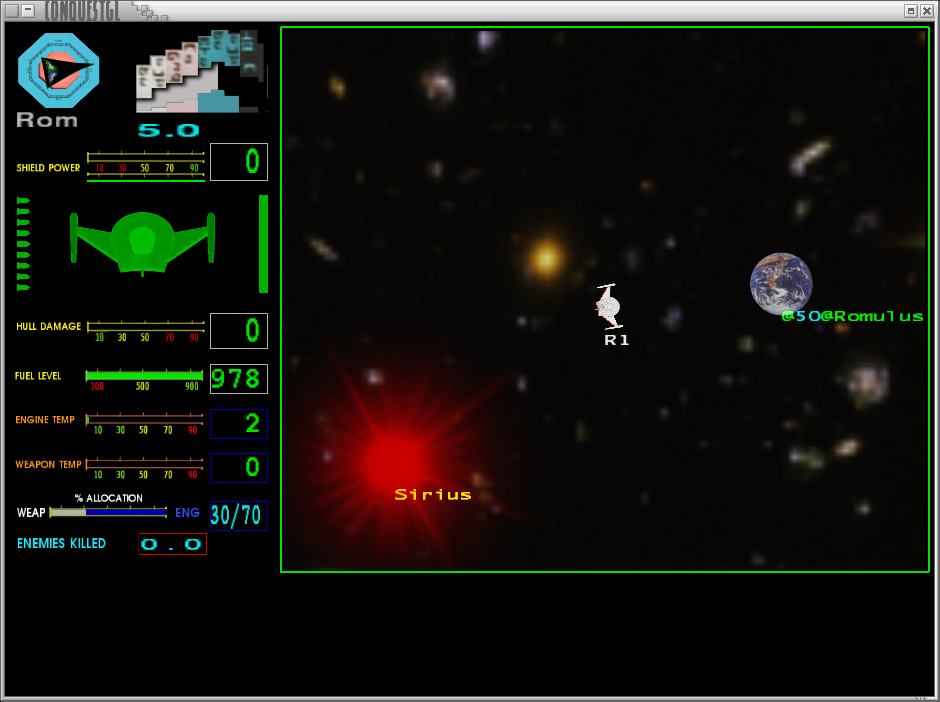
Details:
Status section on left, main viewer on right.
Status indicators top to bottom:
Heading - top left, currently locked on to Romulus - otherwise indicates 0° - 360° heading for ship
Warp speed - top right - currently set at 5. can indicate orbit, 0 - 10
Shield power - shields currently down, half bar below, if up level shows in top gauge
Ship icon status - color = damage status, shield indicator, torpedo inventory left, phaser recharge gauge right
Hull damage - gauge indicates percent of damage
Fuel level - gauge indicates power available in energizers
Engine temp - gauge indicates engine temp status
Weapon temp - gauge indicates weapon temp status
Allocation - gauge indicates how efficient engines and weapons are
Enemies killed - count of ships killed and armies bombed
Viewer - currently shows area of space around ship - can also display Long Range Scan (LRS)
When you start a new ship, you will enter your home system by default. If your team has control of all 3 core planets of another system you will get to choose a system. When the view appears your ship will be locked onto the systems home world (Earth, Klingus, Romulus, Orion) with warp somewhere between 3 - 5. Your shields will be down.
Congratulations, you have successfully entered the game.
5 - Conquest Objectives
If you have fun playing conquest, then you are successful. Suggested etiquette guidelines will be near the end of the guide.
The primary objective of conquest is to conquer the universe. This happens when one team has taken (landed their armies on) 25 planets. Obstacles to this objective include: other players, self-ruled planets, suns, robot defense ships, human error, and possibly the doomsday machine.
Secondary objectives include staying alive as long as possible and keeping statistics - a "high score" if you will. Conquest does not specifically tally a "high score", but the (U)ser stats are ordered by a skill factor. Getting on top of this list is not as simple as racking up a lot of kills. This will also be covered near the end of the guide.
To achieve these goals you must master the elements of the game. You will need to be familiar with the following:
Universe items - Suns, Planets, Moon(s), Ships, Torpedoes, Negative energy barrier, Doomsday machine
Planet items - orbit, armies, damage range, team, self-ruled worlds
Ship items - hull, shields, fuel, heading, warp, phasers, torpedoes, allocation, war state, damage, limitations, beaming armies, cloaking device, tractor beam, carried armies, efficiency
==============================================
Lets cover the universe first. Following is a master map of the universe centered on Murisak:
(Note: this is an enlarged version of the (M) LR scan enhanced to show all default conquest planets - including the Syrinx / Hell / Jinx system.)
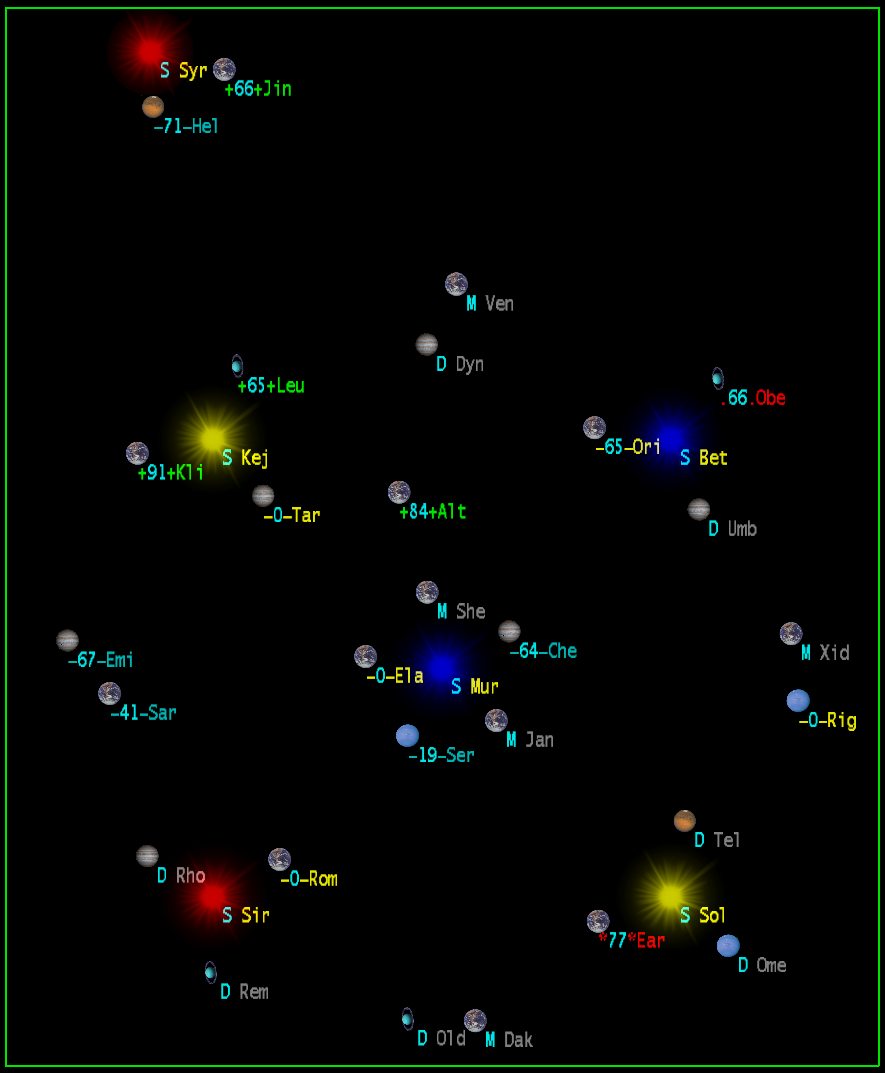
Conquest's driver maintains the planetary body (suns, moons, planets) orbits and ships courses on a 2 dimensional grid.
The universe can contain: Suns, Planets, Moons, Ships (including robots and vacant), Torpedoes, and the Doomsday Machine.
In the standard conquest universe Murisak (the sun at the center) is the only fixed planetary body (suns, moons, planets) - the rest all orbit something. The 4 binary systems along with the 4 team core system suns have a fixed orbit around Murisak. All other planetary bodies move in their orbits.
At the far edge of the galaxy of systems is a negative energy barrier. You can get through this at maximum warp with shields and hull both at 100. Typically you will find empty space.
The universe is measured in units that don't relate to any logical units such as light years or meters. We just consider them conquest units - hereafter referred to as CU.
==============================================
Lets cover planets next. Following is a list of planets in the initial state:
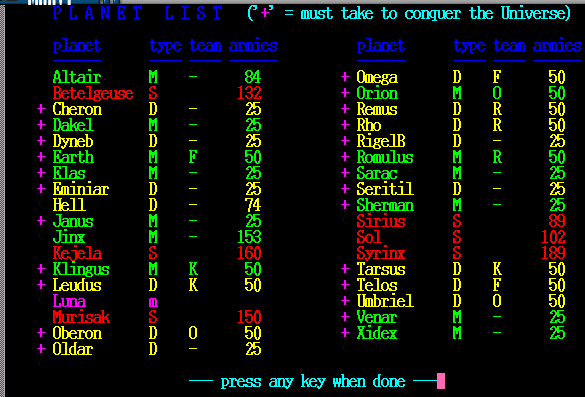
(Special note: when you login to a server the universe will probably not be in this state.)
Note the purple '+'. This indicates the 25 planets needed to conquer the universe - you must have your team of armies on these 25 planets. When you beam down 1 army to the 25th planet the current session will end with a conquer and the universe will reset to the condition of this list.
Type guide (standard universe)
M - Class M planet - ships fuel restores faster, army counts increase faster
D - Class D planet - army counts increase more slowly
S - Sun - the army count is only shown on the operator list and is used for ship damage
m - moon - you cant land armies on a moon - it is just window dressing
There are 4 planets that don't count towards the conquer in the default universe. More planets and other types of planets may appear in modified universes.
Each team has 3 core planets (shown on above with F = Federation, K = Klingon, R = Romulan, O = Orion) that start with 50 armies each. Self ruled planets (13 total) needed for a conquer start with 25 armies. Extra planets (3 total) have a random count of armies. The Klingon home system is shown (Note: praxis is not in the standard conquest universe.)
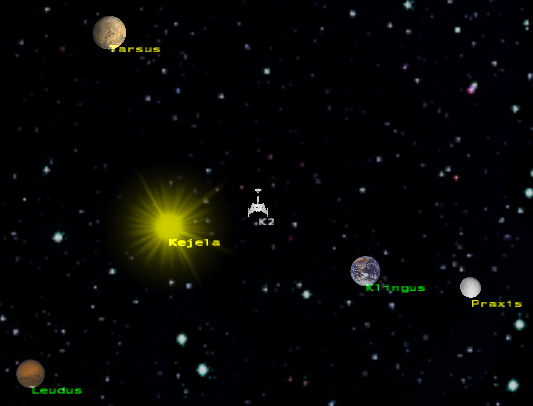
Orbit - the condition of a ship orbiting a planet. This is necessary to: 1. beam armies up or down - 2. bomb enemy armies. There are 2 ways of achieving orbit:
1. approach the planet. When within 300 CU, slow to warp 2 or less and hit 'o'.
2. hit 'k' to set course - enter the planets first three letters (kli for Klingus) and hit 'tab'. set any warp - when reaching the planet you will slow to warp 2 and automatically enter orbit. This is the preferred method, but you must view the course in case of enemy ships, enemy planets or suns in the path.
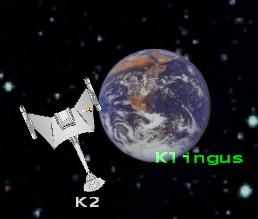
Here is a Klingon destroyer orbiting Klingus:
Damage - suns or planetary defenses can damage a ship within a radius of 500 CU (conquest units.)
Planetary defenses - your ships shields and hull will take damage proportional to the planets army count if:
1. you are at war with the team of the armies on the planet (i.e. Romulan armies are on the planet and you have war set with Romulans)
2. you attack (bomb) a self ruled planet's armies
3. A sun, in which case you will always take damage
Note: you will not take damage from your own planets if you set war with your own team, however - you will not be able to beam up armies!
Armies exist on planets. One can assume normal populations do as well, but the computer only tells you about armies. As time passes armies recruit members and increase. If the army count for a planet gets too high (somewhere over 80) desertion and disease reduce the number - its possible for an army count to fall below 3!
Team - based on the team who's armies are on the planet - Federation, Klingon, Romulan, Orion, or self ruled. Outside the 3 core worlds of a given team, these armies are found on a planet if a player beams them down.
Self Ruled - a true self-ruled planet - 16 of these exist when the default conquest universe is set.
Uninhabitable - if the doomsday machine wipes out all of a planets armies the planet will be uninhabitable for a short time. After this it will have NO armies.
==============================================
Doomsday Machine:
"Jim, I've seen it...the devil itself - that...that thing, out there."
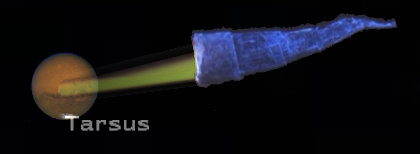
Unless blocked by conqoper option the driver can randomly activate the doomsday machine. "Tracing back on our star charts, we found that it came from outside our galaxy beyond the great barrier."
Its purpose is simple - fly around the galaxy attacking planets. Its anti proton beam (pure...absolutely pure!) blasts armies on planets until they are gone and leaves the surface a radioactive waste land. If the doomsday machine reduces a planet to 0 armies the surface will be uninhabitable for some random time period.
The doomsday machine is attracted to planets with large populations and powerful ships. Any ship coming within a certain radius and attracting its attention will suffer damage until moving beyond the doomsday's damage radius.
The doomsday machine can be killed - watch the original series Star Trek episode 35 - 'The Doomsday Machine' for a hint. "Kirk to Enterprise - gentlemen I suggest you beam me up."
==============================================
Finally we cover ships:
Your ship is your home in the conquest universe. All of its systems are based on Star Trek concepts (the original series - conquest was created in 1982.)
While each system is pretty easy to understand, using them in combination can be quite complex and takes some practice. This will be covered in combat tactics, here we are just covering the systems and their operation.
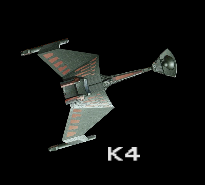
Hull - a ships hull is its outer skin, internal structure and components. When your ships hull damage exceeds 99% your ship explodes! Ship damage over a certain amount will affect your warp speed, and the more damage the slower you go. Your crew is always hard at work repairing damage and can repair it even faster when 'R' repair mode is set. Note damage can be repaired faster when orbiting friendly planets. Also Note: you can not have raised shields, fire weapons or move in repair mode - repair modes stops when you take any of these actions.
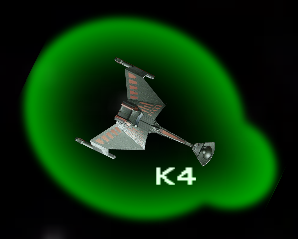
Shields - shields prevent your hull from taking damage when they are raised. Your shields will be lowered to beam armies or bomb armies. Thus when you bomb a planet your hull is taking damage! shields can only absorb 100 units of damage. Once damage is absorbed shields will recharge and they recharge faster when they are down. Moving with shields up also uses more energy. Shields are raised with '+' and lowered with '-'. 'R' repair mode, 'b' beaming and 'B' bombing will lower shields as well.
Fuel - fuel is really the power available in a ships energizer. It is self replenishing if your rate of consumption is less than rate of recharge. Your fuel energizes faster when orbiting friendly class M planets as well. When you run out of fuel your ship is a sitting duck - you cant do anything until it recharges. Weapons take a considerable amount of fuel to fire, and most ships start consuming fuel once they exceed warp 4.

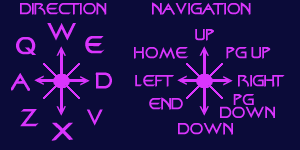
Heading - direction your ship is pointing. If you are in orbit this constantly changes. It can be set with 'k' navigate command, arrow keys (up 90°, down 270°, left 180°, right 0°) and keypad diagonals (home 135°, end 225°, pg up 45°, pg down 315°). In conquest 8.2 the default mouse middle button click sets your heading to the click point. 'k' navigate details: you can enter a numeric direction of 0° - 360° or qwedvcxza (in compass terms - NW, N, NE, E, SE, S, SW, W) according to this diagram:
You can set your heading to a planet by hitting 'k' and entering the unique initials of the planet - if you hit 'enter' the heading number is set based on current planet position, but if you hit 'tab' your heading will lock onto the planet - when you arrive an auto orbit insertion will be attempted.
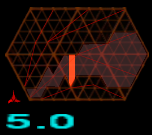
Warp - the warp setting is the speed at which the engines move the ship on a given setting. maximum warp varies from 8 to 10 based on ship type. Hull damage affects warp speed - the higher your hull damage, the lower your maximum warp. The faster you go the more fuel you use. Above warp 4 most ships start to consume more fuel than they recharge. Warp is set with '0' - '9' and '=' for a scout's warp 10 setting.
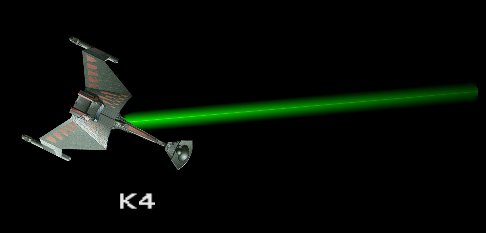
Phasers - Phasers are beam weapons with limited range. Usage is also limited by energy supply and weapon systems heat levels. If you can hit a moving enemy ship phasers are the weapon of choice at close range - they do a lot of damage. Please note that it is hard to hit a moving ship with the keyboard controls. The 8.2 enhancements, however, allow you to fire phasers in the direction of the mouse cursor by clicking the left button, which makes phasers a useful and devastating weapon. Key fire for phasers is 'f' after which you must enter a direction. 'F' will fire phasers in the last entered direction (dir for anything, not just phasers.)
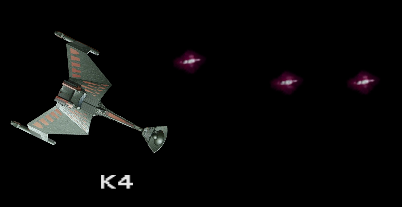
Photon Torpedoes - just referred to as torpedoes from now - take some fuel to launch and you can only have nine flying at one time. These are the tactical long range weapon of choice, easy to aim even with keyboard controls. Torpedoes do damage based on distance from explosion point. Incoming enemy torpedoes can be detonated with the 'd' command, limiting their damage to your ship. You can also detonate your own torpedoes with 'D' if you miss and need to reload. Torpedoes have a range ~8000+ CU (50 secs flight time - depending on speed), when they expire. They fly at warp 10 - 14 depending on the ship type firing them. In the 8.2 enhancements torpedoes can be fired in the mouse click direction with the right button. You can key fire photons with 'p' for one photon and 'P' for a burst of three. You can enter a dir or just hit enter to fire in the same dir.
Bombardment - this attacks the armies on a planet. You can attack any self-ruled planet at which point that planet will go to war with your ship. To attack team armies (Federation, Klingon, Romulan, Orion) you must be at war with that team. When you are bombing a planet you will suffer hull damage as shields cannot be raised. 'B' followed by 'tab' starts a bombing run.
Allocation - determines how effective weapons and engines operate. ranges from 30% - 70% and inverts between engines / weapons. (i.e. if engines are 70%, weapons are 30%.) Whichever has the highest energy allocation will consume less fuel and heat when used. Ideally you want weapons (phasers, torps, bombardment) at 70% when firing and engines at 70% all other times. 'A' changes allocation - you can enter 30 - 70. The number entered is set for weapons. Hitting TAB will swap the eng/wep allocations.
Engine temp - if your engines overload, they will stop functioning for a random time period. Moving with engine allocation set to 30% causes them to heat faster and consumes more fuel. You will be able to move again once engines cool down.
Weapon temp - if your weapons overload, they will stop functioning for a random time period. Firing with weapon allocation set to 30% causes weapons to heat faster. You will be able to fire again once weapons cool down.
War state - you can set war with all four teams. This includes your own team! your weapons will not hurt another ship unless one of you is at war. Likewise to bomb armies of a given team you must have war set with them. (i.e. to bomb Federation armies, you must be at war with Feds.) Once you bomb armies or kill a ship the war setting is permanent (cant be turned off) until you die, or self destruct. If you are at war with you own team, you will not be able to beam up armies - they wont come on board a pirate ship. 'W' enters the set dialog. You can toggle war state with FKRO for any team you are not permanently at war with. Hit 'tab' to complete the setting.

Beaming armies - if you are orbiting a team planet you can beam up armies, and carry 2 per kill up to the ship max. This max is based on the ship type. You can beam armies down on a team planet to bolster army count, or an enemy planet to take over. 'b' beams armies when orbiting a planet. If you are carrying between 1 and (max - 1) you will have the option to beam 'u'p or 'd'own. When you beam down to an enemy planet you will suffer hull damage as shields will be down.
Carried armies - the only reason to carry armies is to conquer a planet. If you kill a ship carrying armies you get credit for the armies too. This makes army carriers a target to some players. Carrying armies also uses more fuel when you move.
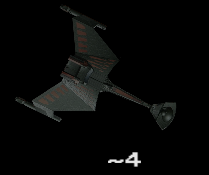
Cloaking device - once activated your ship does not show up in the display or LRS. If you are not moving (this includes orbital movement) computer information will not give a fix on your ship. If you are moving its possible computer info will provide "muddy" info - (i.e. an approximate location.) In the original VAX conquest the cloak was useless. In net conquest you can cloak and hide indefinitely - this tactic is used to leave ships vacant for play breaks. The cloak uses a lot of fuel if you move, and you can't fire weapons while cloaked. However, you may still find tactical uses for the cloak - 'C' followed by 'tab' cloaks your ship.
Tractor beam - the tractor beam can be used to tow ships. Any ship, at war or peace. The difference in speed between the two ships must be warp 2 or less and range less than 501 CU. 't' engages the tractor after you provide a ship number and 'u' releases it. You can try to break free by pressing 'u'n-tractor if your ship is being towed against your will.

Computer - provides information on planetary bodies and ships via the 'i' info command. To request info on a planetary body enter unique initials (i.e. k could be kejela or Klingus, kl can only be Klingus) for its name. You will get the full name, type, range, direction, and army count if your team has scanned (passed within 500 CU) of that planet. To get info on a ship, enter the ship number. You will get pseudonym, live kills, type, war state with you, [ range, direction, shields and damage - if uncloaked. ] You can also try these generic strings for information - np = nearest planet, nep = nearest enemy planet, nap20 = nearest army planet - more than 20 armies (all planet requests can be qualified with an army count), ns = nearest ship, ne = nearest enemy.
Efficiency - the more live kills (i.e. kills in game, as opposed to statistics list kills) you have the more efficient your ship will become. Engines use less fuel and weapons do more damage. Everything works better...comtrya!


Ship type - types are scout, destroyer, cruiser. In the original VAX conquest Orions were always scouts, Romulans were in cruisers and Klingon and Federation ships were destroyers. In net conquest, your initial ship is the default from VAX conquest, but once you have one kill you can orbit a team planet and change it with the 'r' refit command.
Each type has the following abilities
.....................scout.....destroyer....cruiser
max warp..........10............9.............8
photon warp......14...........12...........10
max armies........7.............9...........11
engines..........better......even.......lesser
weapons.........lesser.....even.......better
Command - your ships abilities are controlled via keyboard and as of 8.2 mouse buttons.
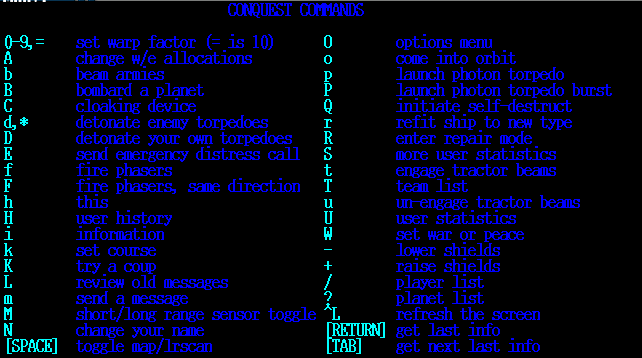
default mouse actions-
left button - fire phaser in the direction indicated by mouse pointer
middle button - change ships heading to the direction indicated by mouse pointer
right button - fire a torpedo in the direction indicated by mouse pointer
Some commands require further interaction, this may be pressing 'tab' or 'enter' or more detailed responses. Some commands just provide statistics and don't affect ship operation.
6 - Combat Tactics
Don't give up the ship!
Hopefully this section will help a neophyte avoid most of the simple blunders that end up in a dead ship.
Becoming a combat veteran and expert pilot requires game & control familiarity, experience and sticking to your guns.
There is one in-escapable fact: you will lose a few ships (perhaps quite a few) before you get good at combat.
You must not get discouraged and give up before you get to the really fun part of the game.
==============================================
Familiarize yourself with all the controls...you need to be able to operate these (list prioritized) controls quickly:
(d) - detonate torps. you need to be able to detonate incoming enemy torps very quickly
(p,P) - fire torps. being able to fire torps at enemy ships accurately is essential to survival and besting an enemy
(f,F) - fire phasers. In the terminal days (+ GL client until recently) any one who could fire an accurate phaser in close quarters combat was almost guaranteed victory
(all dir controls) - direction changes are essential - using 'k' to change course is not the fastest method
(0-9) - warp control. being quick to set higher/lower warp can win the battle and save your ship
(+|-) - shields. always raise your shields...raise them early if need be
(D) - self detonate torps. If you miss the mark you need to detonate ASAP to refill your tubes.
(M) - sensor toggle. occasionally taking an LRS look can apprise you of approaching enemies.
- stats. you must watch your ship status. be aware of shield level, hull damage, fuel level, eng & wep temps) these things are critical to survival
Keys to avoid in combat - H i L m N O Q R S t T U W / ?
These either:
1. call up screens that cover the action
2. open a sticky dialog where you have to type something or acknowledge an event.
With the advent of mouse controls in 8.2, things are much easier on beginners. We have tested out the mouse controls against robots and they simplify combat greatly. Still you will need keyboard controls. In the advanced strategy section we will cover macros and how to use them to enhance combat and tactics.
==============================================
Pre combat checklist:
You don't really need a hard copy of this but it should be in your mind, before an enemy ship comes on screen.
1. are you aware of who your enemies are and where they are? - if a war condition exists on another ship you need to know their general location. This includes robot ships - you don't want a surprise encounter with a robot.
2. did you raise your shields? - shields are 100 pts of damage *Before* your hull gets beat on!
3. is allocation set to 70% weapons? - you do more damage this way.
4. are you clear of all dialogs - don't get stuck in message mode, course changes, name changes or any other text entry dialog.
5. if bombing and you suspect an attack or enemies are close always limit hull damage to < 35 - if an enemy is approaching but not on screen repair right away!
6. watch live ships that are cloaked - even when they "were" at peace.
==============================================
Combat:
This is it. Your pulse is racing, your ship is moving in on an enemy and he's fired some torps so you know a fight is on...
Guidelines:
Try to determine your opponents tactics. Knowing how the enemy will react is important to deploy effective counter measures.
Stay cool. If you get fumble fingered set direction away from your enemy and increase warp - pause (but don't stop detonating torps!) for a bit to get back into control. Then make sure you have fire controls in hand, turn and let him have it.
Conserve fuel and minimize systems heat up. Conquest is part RTS, always conserve resources. One of the worst things is being hounded by an enemy when your fuel is gone or weapons / engines are overloaded. Fly at lower warps (< 6) when possible. Warp 9 is for running and cutting around planets / suns fast. Don't fire off a ton of torps before your enemy is past the edge of the screen. Try to avoid excessive detonates (d,D) and pointless phaser fire.
Watch where you are going - don't fly into suns or enemy planets. And try to lead chasing ships into such obstacles. A load of torps and a hot sun can do a ship in. Try to avoid the direct approach - don't fly directly _at_ your enemy, go to either side. When torps are fired they are coming directly _from_ your enemy.
Strike decisively - a fast barrage of 9 torps at close range with a couple well placed phaser shots will do enough damage to take out shields and maybe even the hull. Major damage cripples a ships warp...a slow enemy is an easy target.
Watch for sudden slow downs in both warp and weapon response - this could be indicative of low fuel.
Actions:
Entering directionals - direction is needed for 'k' - course, 'f' - phaser, and 'p','P' - photons. If you can figure out the angle (0° - 360°) thats great, but it combat you need to respond quickly. following is the quick key direction chart and quick navigation keys:

each key will produce a direction as indicated - any combination of direction keys can be entered for all 3 directional requests (i.e for 90° enter 'w', for 22° enter 'ed') navigation keys when pressed will set heading for that direction (i.e. for 225° press 'end'.)
Firing photons - when firing at an opponent try not to fire at the ships current location, learn to lead the ship by firing ahead along its path. If a ship is coming head on, fire at its edges - sudden turns wont avoid all your shots.
Firing phasers - key firing of phasers in combat is one of the greatest challenges. The best way we've found is by lining up a firing angle ahead of time. using phasers in a terminal client was practically pointless unless you had a grid hit (i.e. a 90° shot.) with the GL client phasers are a bit better - and with 8.2's mouse controls even a neophyte can effectively aim them! just left click on the target ship. You still must be in phaser range, and phasers are most effective within 600 CU. Note: if your enemy is in phaser range, so are you!
Tactics:
Possible responses to strategies used against you - YMMV.
Decisive strike, blitzkrieg - if you know an opponent is coming in fast for the kill, turn and lead away. Try to stay beyond phaser range (~1000), detonate torps when they appear and only fire an occasional single torp to wear down shields. This enemy is burning fuel fast. be ready for your own decisive strike when they break off - you will have to be quick for an effective attack though.
Square dance - 2 ships dance around firing off torps and often changing directions, usually out of phaser range. This often happens when neither opponent is clear about the others tactics. fire less torps off, but make your shots on target - wear down that shield. get a good idea of detonation range to minimize detonate usage. Try to find an opening for a blitz. Its likely your opponent might be off balance and unprepared for such a tactic. Try to avoid a straight rush - if they are prepared its a sure bet 9 torps and a couple phasers are aimed right at you.
Sun dance - 2 ships circle a sun firing torps and trying to trick the other into the sun. fire less torps, conserve fuel as always. flying through the sun is NOT a good tactic. This scenario is pretty much a standoff and waste of fuel. pick a good direction (one that leads to a fuel planet) and leave. If they follow get ready to try another gambit.
Long chase goodnight - long chases are a waste of fuel. If you are the chaser consider breaking off for a fuel planet or other pursuits. If you are the chasee and fuel is low head for a sun - you can do an effective close range sun dance and recover some fuel.
Robot surprise - this surprise is never fun. If a robot is running and you are at war with that team be careful chasing their ships around, especially near the home system. You want to avoid a robot - human tag team if possible. always keep a location awareness of robots you are at war with - they can be very daunting opponents.
Annoyance - in the old days of VAX conquest Orions liked this tactic. They could outrun any ship and their torps were faster even if less damaging. This opponent fires torps (often singles) from a distance off screen. If you have one of these around you always have to be on the alert for incoming torps - especially when bombing a planet! try to trick them into a sun if possible by lead or chase. If they do get burned, try a warp 9 blitz. If you see a stream of torps along the same track, set a tangent course and warp - its better than detonating them all and risking shield / hull damage. Past experience suggests these pilots may not be eager for a direct confrontation.
Cloaked - this is dumb when on screen! you saw where they were - fire 3x torps that way fast. Then check info - unless they stopped you will get a reading. Try to determine a direction and fire single torps that way. If they are moving and you pay attention you have them. If they did stop and the 3x doesn't hit fire single torps in 15° (or so) increments to either side of the volley. Don't fire right away, wait a couple secs. - you don't want the cretin detonating all torps at once - if this does happen fire on the detonation center again. If one torp blows, fire on that location with more 3x torps. If you lose them keep an eye out in main view and LRS - most cloak cretins hit warp 9 and try a turn. They are burning fuel fast and are likely to uncloak before they run out. If they intend to attack they must uncloak - be prepared, keep your shields up.
You want to cloak? get off screen first - and remember they can still see you on LRS for a bit - try to time the cloak with the LRS fade. If possible get around a sun - this limits the approach angle. If they are following a straight pursuit path to you make a 90° turn and stop completely before you cloak. problem is if they had a fix they can still target you. If search torps will pass you by, do NOT detonate. Do keep your shields up. If you detonate some torps - uncloak then attack or run, detonating torps are a sure sign of a cloaked enemy.
Beware fake gambits - an enemy might fire barrages of torps and move at warp 8 then hit warp 2 and start firing singles. when you go in for the kill you get 9 point blank torps and multiple phaser shots... watch square dancers closely too. If an enemy wont let you get close, keeps turning this way and that - watch for a sudden rush.
Its easy to write down and talk about these strategies, but you have to practice them against live players (robots are not great practice) to get the hang of them.
==============================================
Post Combat:
If you are limping with heavy damage or low on fuel, get to a repair / refuel planet fast. If your fuel isn't very low you can repair where you are if there are no handy planets near. Always refuel, recharge shields and repair damage.
Many defeated players re-enter with a fresh ship and immediately make a max warp bee line for you - they know you are hurt. Be prepared for this - if info shows them zooming towards you, have a repair planet in mind or move away from the combat arena and cloak to repair / refuel. Remember not to move while cloaked.
You just slaughtered your opponent - he didn't even return fire. If the player returns, find out if he's a newbie - recommend that he come to this site to read these tips and maybe give him some tips in game. You may have also stomped a vacant ship.
7 - Art of Conquest
The ultimate goal is to take over the universe and leave your conquer message on the (T) team stats page.
Whether done by a team effort or a lone gunslinger, a conquer follows certain designs.
Genocide - your team may not have armies! This is tough - especially when another team controls 90% of the galaxy. You have to bomb the invading armies on your home planet (Fed = Earth, Klingon = Klingus, Romulan = Romulus, Orion = Orion) down to 3 armies. You need 3 kills - once at this level orbit your home world and hit 'K' to attempt a coup...it may not work. If it does, you will have a minute part of the population form new armies after the invaders are wiped out. If it fails you will have to wait - go bomb the 2 class D planets in your home system. Watch the timer on your home planet and when it expires go try the coup again until you succeed. The next step is to wait for army build up and take the other 2 home system planets. Don't stray far from home until your system army counts are up (we recommend at least 30 armies per planet.) This takes awhile - you must defend your planets. Everyone knows recently successful coup systems are weak and easy prey. When you do venture away, stick to nearby systems - you may still have to defend your home from would be invaders.
Attack the planets - to take a planet for your team you must bomb its armies down to 3, then get some of your armies to beam down. To attack self-ruled planets go into orbit and start bombing. To attack another team you have to set war with them - do NOT try this while orbiting a planet - the war program pause will let the planet attack you for the entire pause time! You should always raise shields before you go into orbit. In the event you are at war with a planet this prevents unneeded hull damage, and when you break off bombing the shields go up instantly.
Bomb runs - must be conducted with care, when you bomb a planet you take hull damage. Always try to break off by going to warp (5 is good) and set course directly away from the planet before your damage is over 55%. If an enemy ship is near (within 6000 CU) try to keep damage below 35% (if he sweeps in at max warp, you can still repair some damage before combat.) This is even more important if you are attacking an undefended home system and must tangle with a robot. If no enemies are about, once you clear the planetary defenses (around 1000 CU from the planet) hit 'R' for repair mode. Beware of sitting in the orbit path! A planet can sneak up on you if you don't pay attention and wipe you out - always try to move at a tangent to the orbit when you seek a repair spot. Return to bombing when your damage is around 3 - it will be 0 by the time you make orbit.
Now the target planet is down to 9 or 10 armies. If there are enemy ships around, or robots - bomb it to 3 armies. If you are clear of enemy ships, go for your armies while the planet is at 9. Look at the planet list with '?'. There are 2 things to consider when getting armies - which supply is closest and which has the largest count. Take armies from any planet exceeding 90 even if it is far away. If there are 2 or more, alternate between them. Give your home system planets priority in this. This will prevent large army crises, which decimates your armed forces. These rules do not apply if you are racing to the last few planets for a conquer against enemy forces - in this case, grab armies from the nearest source!
You are getting adept at taking planets. Now you have to decide how to conquer the universe! Its usually better in a fresh universe to go after self-ruled planets near your home system. If you haven't set war with any other team they cant attack you unless they set war. This will also keep you safe from any robots that get released. Once the self-ruled planets are finished use your judgment. We like to go after the team with the most planets. Sooner or later you will have to take an undefended home system - this is tricky depending on how aggressive the robots are set. If players of other teams are around you will eventually have to battle them. We try to save the home system planets until last - unless they leave it grossly unguarded.
Balance army counts - if your team hasn't reduced the universe to several uncontrolled planets try to keep your armies even. If you just conquered 3 or 4 planets and have other planets with armies over 75 or so, try to make a few shuttle runs to build up the recent conquests and keep your other planets away from the crisis level. A crisis can reduce a planet army count as low as 2 or 3! - an easy target for an observant opponent. This isn't a very high priority - just something to do if a conquer is far off. Watch fuel consumption if you do this as well, shuttling armies around sucks up fuel quickly.
Defend your home system - try not to let opportunists attack your home when you are on the other side of the galaxy. If they do - make an effort to secure it before you vacate the game. Your home planets will be defended by a robot if you have no live players. If a pest is hitting your home worlds and you are *alone* on your team and far away try this to get help: when unobserved, stop (warp 0) and (C)-'tab' cloak in an open spot. then watch for them to go on a bomb run. When they head in vacate your ship with <CTRL>-\ or by [x] closing the window. Log back in right away but don't (e)nter the game - watch the (/) player list until you see your team robot pop up (Federation = M-5, Klingon = Guardian, Romulan = Colossus, Orion = HAL-9000.) When you see the bot appear, (e)nter, uncloak (C) and continue your operations. If the pest can beat the bot, you should return and defend your home system - encourage them to pursue easier planets.
The last planet - the player that beams 1 army down to this planet once the count is 0 ends the session and conquers the universe. Then you get to leave a message of posterity until the next conquer. Fierce battles can occur over the last few planets. If you are the defender you will need help - a ship (or 2, 3 even 4) to defend your planets and keep the army count up, and ship(s) to go take other planets. If you are the attacker you need numbers as well - you need to prevent more planets falling into the other team's hands, and concentrate on bombing and taking those last planets. When this situation occurs the side with a larger number of ships usually comes out on top - but not always. A determined team of 2 can triumph over many.
You've conquered your first universe! Congratulations...
You will see the following text (with your total kill count of course):

Enter your final message and a screen similar to this will appear:
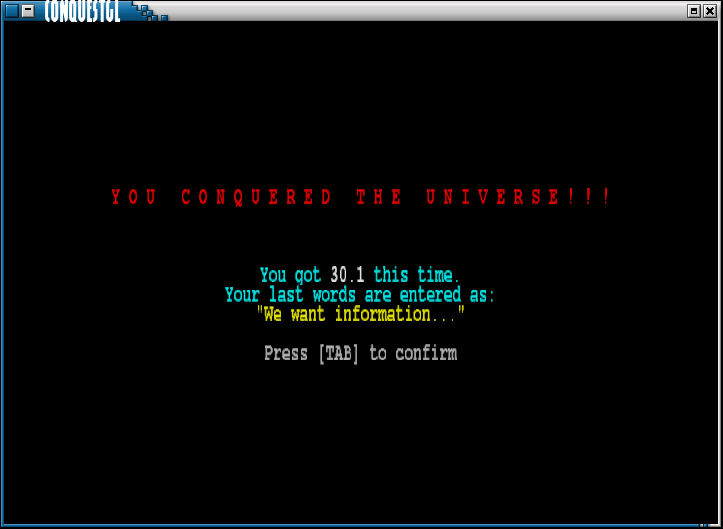
Just hit 'tab' for message confirmation and you will be returned to the game entry screen.
8 - Advanced Strategy
This section will highlight methods used by experienced players to maximize game fun and provide long hours of play.
Bot combat - bots might seem like un-defeatable crusaders to neophytes. Once you have some pilot and combat skill they become quite easy to kill. As of 8.2, bots have different ability levels. The default is hard. Bots appear in response to an attack on undefended home system planets. This means there are no players for that team - or all their ships are currently vacant. Bots arrive somewhere around the home system and set warp 8 straight off. Then they make course for the home planet (Earth, Klingon, Romulus, or Orion). If you are at war with their team and in their defensive sphere they will track you at warp 8. Easy bots seem to have a radius around 2500 CU. Harder bots seek much further away.
Bots use blitzkrieg combat - no other tactics. They only turn away if they are damaged or low on fuel. It is not good to face a bot while you are low on fuel - they are very tenacious opponents. Either get outside the tracking range fast or kill them fast.
There are 2 strategies that seem to work well:
1. go at a tangent to their course (never head straight for a bot!) and hit them with everything (P) 9 torps, (F) phaser and (d) detonate their torps) as they come in range and cross your path. If you don't kill them right away you must turn and go warp 7 - 9, they will track you, and you don't want to stay in phaser range. Bots phaser any time a ship is in range and they hit most of the time.
2. Lead away from the bots approach around warp 4 or 5 (conserving fuel) Wait (and this is the hardest part of this strategy) until they near phaser range. be ready to detonate their torps - they will fire some. Once the bot is at 1000 CU fire (P) 9 torps fast - (d) detonate his torps, then (F) phaser and (d) detonate as he approaches. This strategy works good but has one drawback - if you cant kill the bot, even going max warp probably wont save you. You can stay out of phaser range, but its harder to kill a bot with torps alone and you don't want to run out of fuel if a bot is near.
Break - if you have to leave your terminal for a short time, we recommend - stop (warp 0) and (C)-'tab' cloak. Be cautious using this tactic if enemies are close enough to observe you!
Vacancy - if you cant finish a conquer in one setting you can do 2 different things -
1. vacate( <CTRL>-\ or [x] close window)
2. scuttle (Q) your ship.
We strongly recommend vacancy - those kills you build up help efficiency. When you vacate, don't leave your ship in the open. Some enterprising player might shoot you down! And you can die from accident as well - stray torps, a bot you are at war with wanders by, or the planet you orbit gets taken over by an enemy team - leaving you at the mercy of the invader's planetary defenses.
Go outside the galaxy systems. Either near the barrier or somewhere in the open about 17000 CU from Murisak - try not to use the same spot. Remember Syrinx has a default orbit of 23000. The sun can burn you, and any planetary defenses of hell or jinx should an enemy team conquer them. Once in a safe spot see if any enemies are following and or nearby. Once clear stop (warp 0) and (C)-'tab' cloak and wait for your fuel to max out. (+) shields up next - torps can fly ~8000+ CU (50 secs flight time). If a stray few wander by, you need your shields up. Check the (?) planet list - if the army count is good vacate with <CTRL>-\ or [x] close the window. If army counts are low and you can - try to stay connected for a short time. But be watchful for enemy attacks on the home system - don't just leave the terminal unattended - no bots will appear for defense while you are live! When you return check for nearby enemies prior to decloaking or moving. If you are worried about a genocide for your team, you can carry some armies to provide for easy recovery - but we don't recommend this - carried armies take more fuel to move around.
Statistics - the stats chart is sort of a score board. Unlike most games, however, its not about who has the most kills. It takes the right combination of wins, losses, kills and ships to stay on top. We wont give out the formula because figuring out this part is a magical part of conquests fun!
Macros - macros can be assigned for keypress (f1 - f64) and mouse buttons (s0 - s31). Actual keys are F1-F12, SHIFT F1-F12, and CTRL F1-F12. Existing mouse buttons can also be enhanced with SHIFT, CTRL and ALT in any combination.
A macro can be any combination of keyboard commands with some specials:
\r - equivalent to pressing 'enter'
\t - equivalent to pressing 'tab'
\a - (mouse macro only) provides angle from 0° based on location of mouse pointer with respect to ship in main view, where 0° is directly right of the ship
Macros can be used to solve one of the most pressing combat problems - fire weapons allocated at 70% and fly around with engines at 70%. In combat you have enough to do with out having to switch allocations. From the main menu or in game (not when you are near an enemy ship or planet) hit 'O' for options and '2' for keyboard macros. Now try these:

('up' and 'down' select macro - it will highlight red to indicate this, 'space' changes the macro - enter text at the bottom of the screen.)

f1 fires a burst of 3 photons in the last direction with weps at 70% then sets engines to 70%
f2 fires phasers in the last direction with the same wep / eng switch
f3 sets weps to 70%, raises shields, and brings up phaser directional
f4 sets weps to 70%, raises shields, and brings up 3x photon burst directional
Macros can be really advanced - here is our favorite:

f5 sets weapons to 70%, raises shields and starts bombing
f6 sets course to the nearest planet, sets warp 4 and gets info on the planet
f7 sets engines to 70% and lowers shields
We use these exclusively to bomb planets.
9 - Suggested etiquette
Click here for the suggested etiquette section.
We hope this guide will assist neophytes and less experienced players and provide a more fun positive playing experience for everyone involved.
If you are a player or operate a server please assist and encourage others to play this enjoyable game.

